
This article explains the functionality of the chat flow actions and how it can be used.
Multiple actions can be added to each and every element in the Chat flow based on the use case.
To add an action to the questions:
• Select an element and click on Actions to access the Action bar. Now, click on Add new action.

• Actions can be added to the options in the elements as well.
.gif)
Actions functionality
Actions can be used to perform different tasks ranging from notifying a specific team to setting a custom validation. Let's understand how each action work:
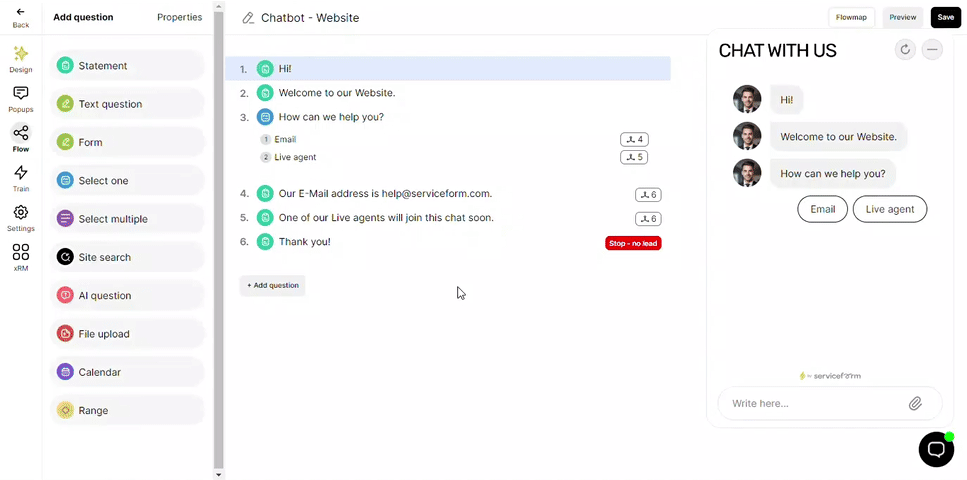
• Send notification
This can be used to notify a specific team when a particular element has been reached in the Chat flow. For example, this can be used notify the Live chat team when the customer clicks on the Live agent button in the flow.

• Set team
Specify the team at the start of the chat flow, and then add a Send notification action in the latter part to Team set in flow. If you have disabled the text area from the design panel, enabling this action will re open the text area.
• Set visibility
This option can be used to display an option within an element based on the availability of a team/ business hours. For instance, the Live agent request button can be set to be visible only when the Live chat team is online.
.gif)
• Add price
Assign values to elements and/ or options which would get accumulated based on the chat messages the flow has passed. The accumulated amount can be accessed by having this code - {{#amount}} - in the element's text.
.gif)
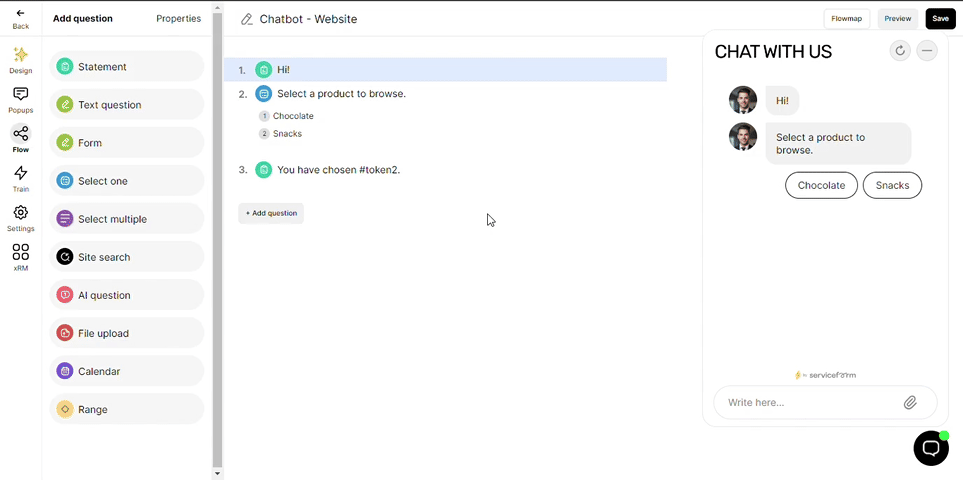
• Hidden tokens
This can be used to store values which can be used to create a customized link at the end of the chat, filtering products on a website.
Hidden tokens can be assigned to both elements and options within it. Once defined, you can use it in the flow as text and as a part of a URL to redirect. It can be accessed by typing "#tokenN" where N is the number of the element, for example, for the token from the second element would be "#token2".
• Redirect
This action can be used to redirect the customer to another URL.
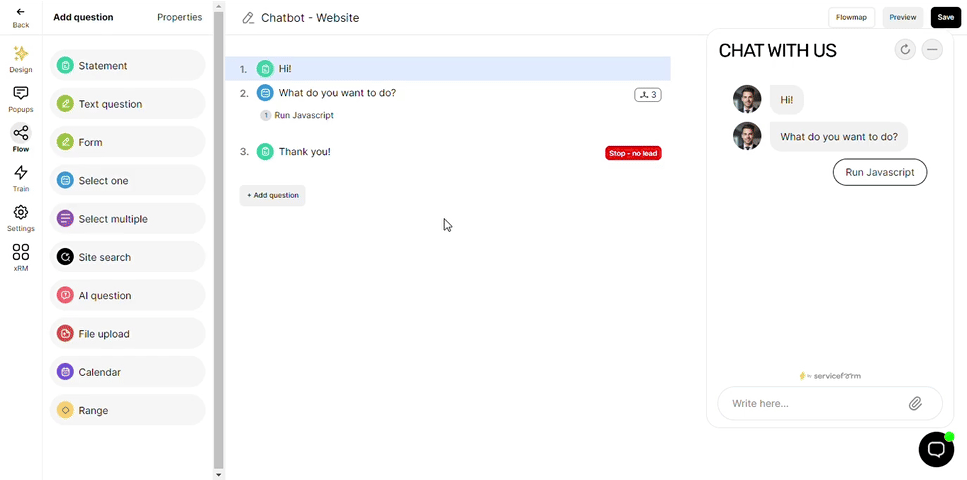
• Run custom JS
Custom Javascript can be executed via this action.
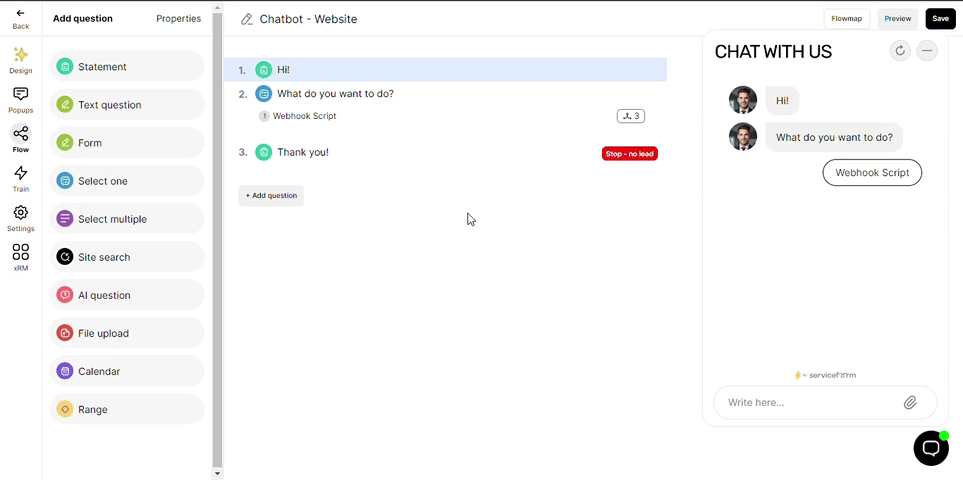
• Webhook
Add custom callbacks/ webhooks. This will override the webhook set for the tool.
• Custom JSON lead validation
This is used to tag elements and/ or options to send the data to your E-mail address in JSON lead format. Make sure that you have set up the JSON lead integration which can be found in the settings section in your Main dashboard. You will receive an Email separately in JSON lead format once the chat is complete(Lead sent).
Note that you will need to set up the integration in the Dashboard setting panel.
.gif)
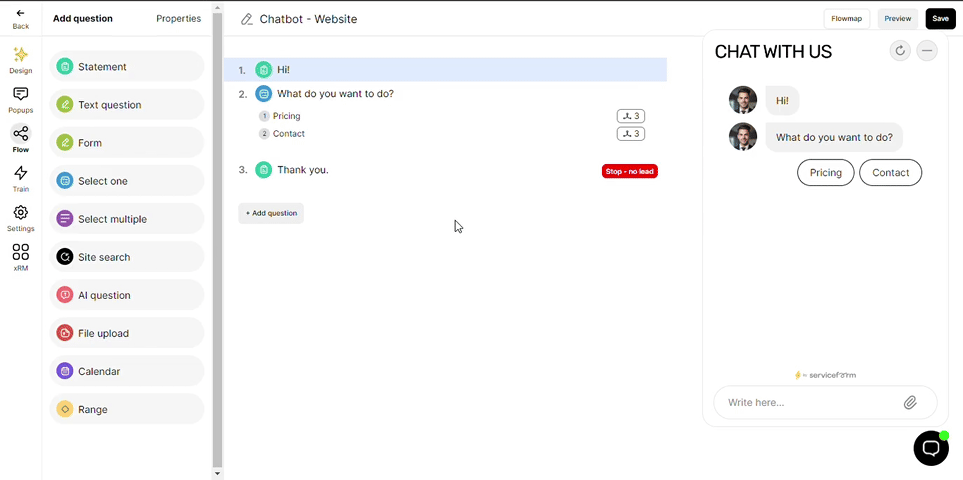
• Single flow integration
The options chosen and the details submitted by the customer throughout one specific flow will be sent through a specific integration that you have set up. For instance, if your question has 2 options, you can set single flow integration to both options separately so that the data specific to that flow will be sent.
In the example below, if the "Car" option is chosen, only the details of the car collected from the question 3 will be sent to the Integration named "Single flow integration".
Note that you will need to set up the integration in the Dashboard setting panel.
.gif)
• Custom validation
This can be assigned to Text questions (Input), Select one and Select multiple and the data can be sent to external CRMs.
When assigning this to a text question element, the data input by the customer will be sent. The Custom validation for Select one and Select multiple will send the option's text.

With the use of these actions, you can optimize your tools to provide a more interactive experience and get more leads.
.png)