

The following is a list of the integrations supported by our system, highlighting key features and benefits. Click on any of the below integrations to explore detailed guides and connect the right tools to your system(s).
Create a dynamic form within a few minutes and embed it on your own and/ or business website. Dynamic forms can be customized to serve various purposes. Here are a few ways in which Dynamic forms can be customized:
Once you've connected your website to Google Analytics through Google Tag Manager, you can start monitoring events on your website. The data layer, in this context, serves as a storage through which Serviceform tools send events to Google Tag manager.
By default, Serviceform sends the following events to GTM via the data layer:
• Interaction - "serviceform_chat_interaction"
This event will be pushed to the data layer when the chat is initiated by the user.
• Lead - "serviceform_chat_lead"
This event will be pushed to the data layer when a lead is sent, i.e. when the chat is complete.
• Live chat - "serviceform_chat_livechat"
This event will be pushed to the data layer when the user initiates a live chat or starts a conversation with a live agent.
• Redirect - "serviceform_chat_redirect"
This event will be pushed to the data layer when the user is re-directed to another website.
• Chat closed - "serviceform_chat_closed"
Triggered when the chat is closed
Default form events:
• Form lead - serviceform_form_lead
Triggered when a lead is submitted via form
• Form redirect - serviceform_form_redirect
Triggered when a redirect occurs from a form
You can rename all of our datalayer, google and pixel event names by using dynamic variables.
You can do this by adding any of the following variables on your site or through the Serviceform pixel or google tag manager. Define your custom event names here:
• window.sfDynamicLivechatEventName = 'custom_livechat_event';
• window.sfDynamicInteractionEventName = 'custom_interaction_event';
• window.sfDynamicRedirectEventName = 'custom_redirect_event';
• window.sfDynamicLeadEventName = 'custom_lead_event';
Here is how a Data layer event would look like:
window.dataLayer = window.dataLayer | | [ ];
window.dataLayer.push ({'event': 'serviceform_chat_interaction'});
In order to start receiving these events in Google Tag Manager, you must have to create a Tag and a Trigger. You will need to create separate Triggers and Tag for each and every event. Let's start by creating:
• Trigger
1. Create a New trigger in the Triggers menu section. Enter a name for the Trigger.

2. Select Custom Events under Trigger Type.

3. Type "serviceform_chat_interaction" as the Event name(Refer to this list) and click on Save. All default Serviceform events would initiate this trigger. Enter a name and Click on save.

• Tag
1. Create a New tag in the Tags menu section. Enter a name for the Tag.

2. Select Google Analytics: GA4 Event in Google Analytics under Tag Configuration.

3. Enter your Google Measurement ID(Tracking ID), you can find this in Google Analytics Data Stream settings under the Admin section. Enter a name for this event.

4. Select "Chat Start" custom event(Events that you have created) under Triggering section and click on save.

5. Click on Submit and review the data in Google Analytics.

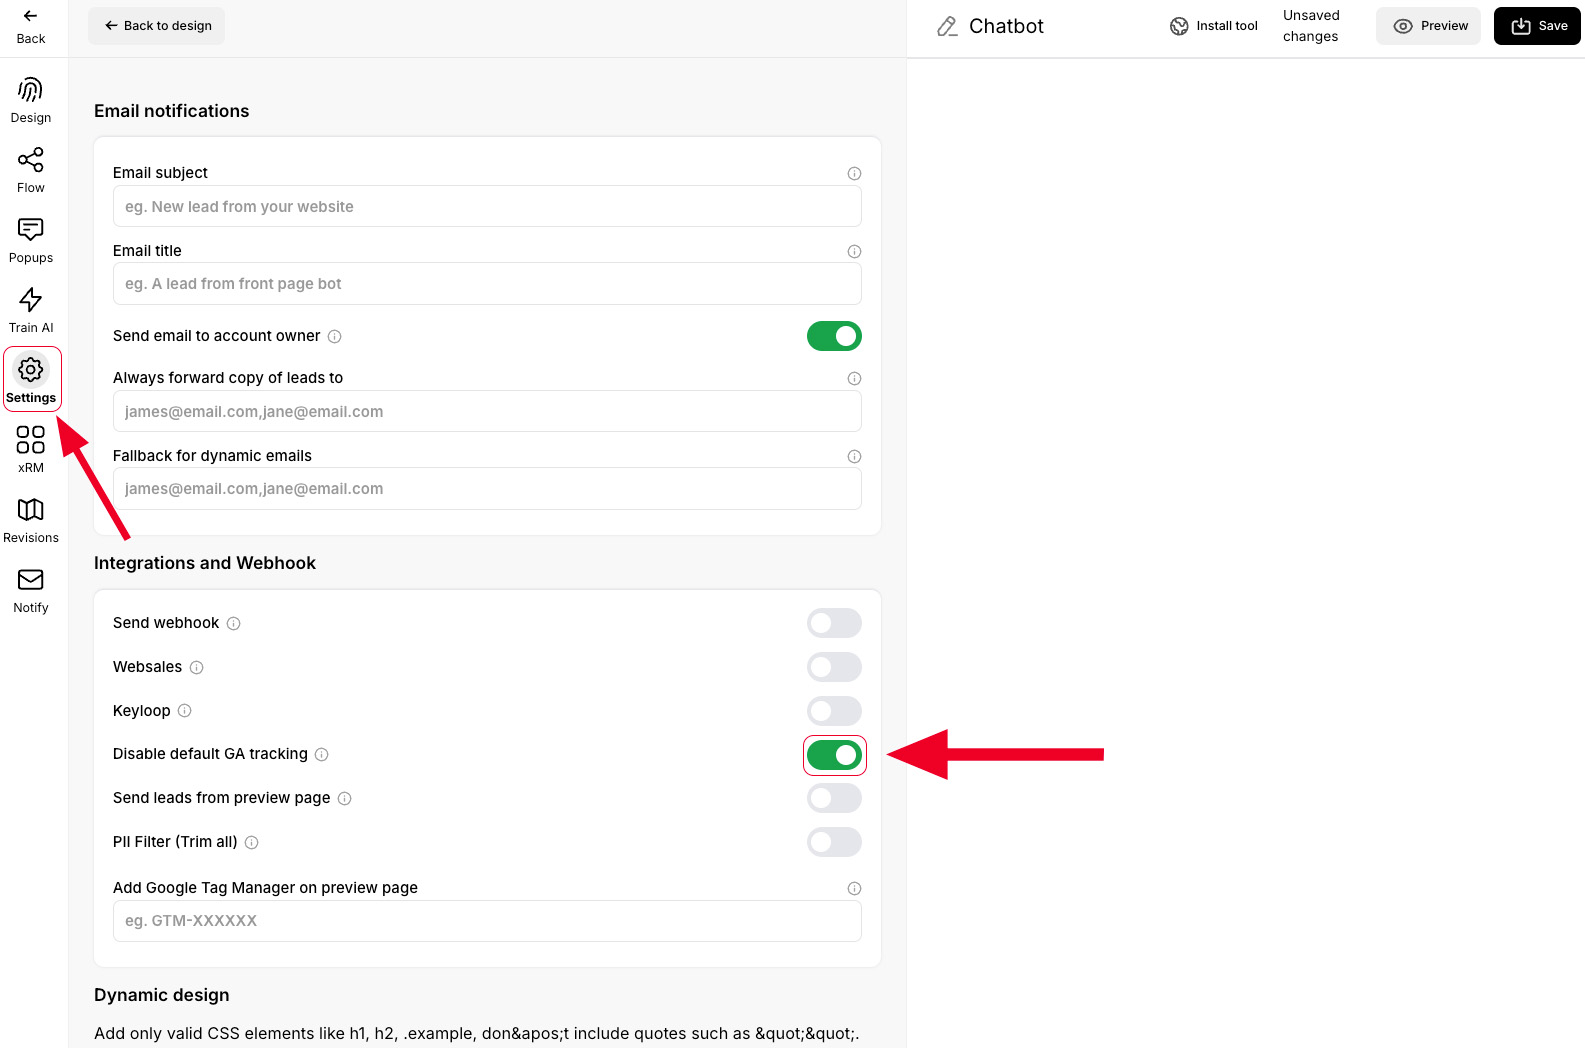
You can disable the default events being pushed to the data layer by following these steps :
1. Navigate to your Serviceform dashboard and select your tool.
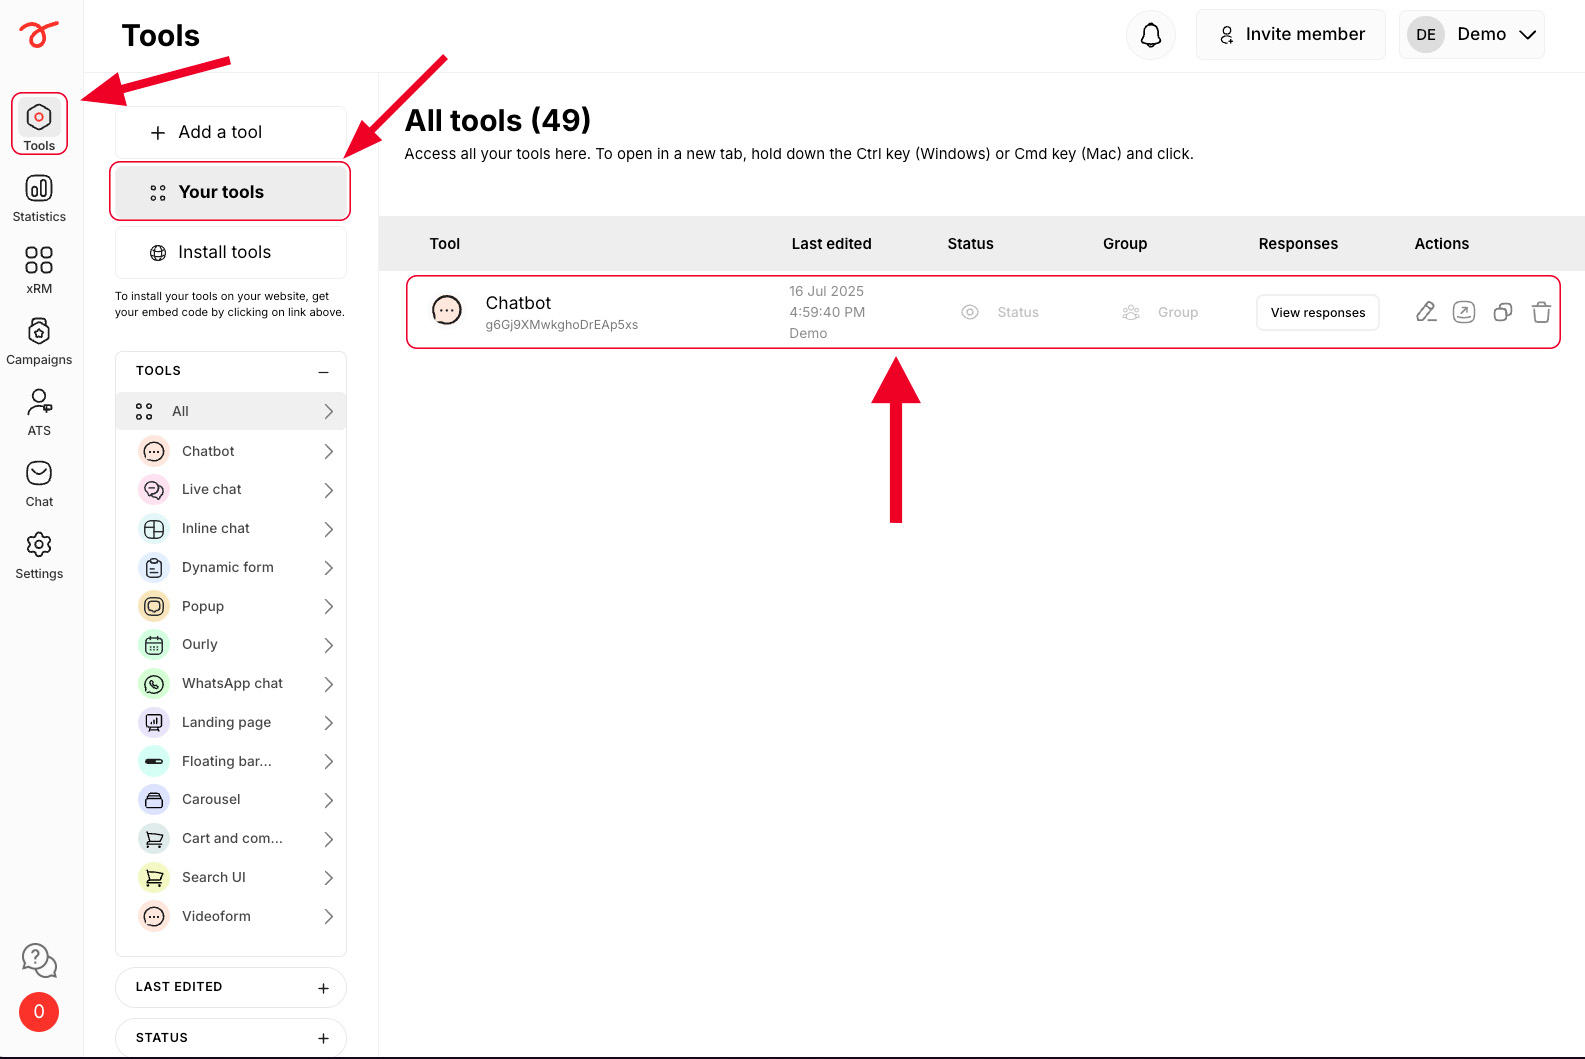
2. Click on Settings and enable the Disable default GA tracking to stop default events from being pushed to the data layer.
Note:
• You can send custom events to the Data layer using a custom javascript event in the tool builder interface. Accordingly, you will need add Triggers and Tags to listen to those events and send the data to Google Analytics.
Serviceform starts for free and you can use it for free forever. If you want to generate more than 50 interactions per month, our plans start at,
Our help team is always ready to help. You can visit help.serviceform.com to access our help documentation or you can chat with one of our support team members here. Also, you can ask anything in an email to our support team via help@serviceform.com.
The free forever plan gives you access to all conversion tools. Our conversion tool suite includes Chatbots, Forms, Popups, WhatsApp Chatbots, Landing Pages, and much more. You can install as many tools as you wish and get 50 interactions every month entirely for free.
You can sign up with just a single click through Google or Microsoft. Or you can enter your company email address and sign up. No credit card required and you can use Serviceform for free forever.
Our easy drag and drop builder lets you custom, personalized chatbots without having to write a single line of code. If you run into any issues, you can always refer to our help documentation.
Serviceform generates a unique pixel code which you need to simply copy and paste into the <head> tag of your website. Then all you need to do is to toggle a button from our simple website setup, and your conversion tool will be live on your website.
Yes, our conversion specialists are happy to help you do the setup. Simply book an appointment with our team and let them know what you want.
Yes, Serviceform tools can be integrated with more than 100 applications including, Hubspot, Salesforce, ClickUp, and even Google Sheets. Click here to learn more.
Currently, only 5 AI Scraper jobs can run simultaneously. If you have more jobs, they will queue and start automatically once a slot is free.
Try using Manual mode and add a few links to see if they work. If successful, you can continue using Manual mode. For websites with complex structures, also try Manual mode with the Advanced Scraper type.
Some websites block automated requests, which may prevent scraping. To fix this, the customer must whitelist our IP addresses:
Whitelisting these IPs allows our scraper to access the website without being blocked or hitting rate limits. We use only these two fixed IP addresses for scraping.
his may happen if:
Solution: Use Advanced Scraper, double-check CSS selectors, and ensure required URLs are included.
Yes. Limit scraping to one language per site to avoid duplicate information. For example, set the site name to Customer FI if scraping Finnish pages only.
Basic: Always try first—it’s less resource-intensive.
Advanced: Use if Basic doesn’t return results.

%20-%20Copy.png)


.svg)
.svg)
.svg)


.svg)


.svg)
.svg)

.svg)
.png)


.svg)


