

The following is a list of the integrations supported by our system, highlighting key features and benefits. Click on any of the below integrations to explore detailed guides and connect the right tools to your system(s).
Create a dynamic form within a few minutes and embed it on your own and/ or business website. Dynamic forms can be customized to serve various purposes. Here are a few ways in which Dynamic forms can be customized:
Enable AI for your tools to provide an uninterrupted customer service to generate quality leads 24/7. This feature can be used in all the Serviceform tools except Forms, Popups, and Lead bars.
AI prompts are text instructions which are used to generate desired AI responses. In order to enable this feature :
1. Select your preferred tool and click on Train AI and enable ChatGPT (AI).

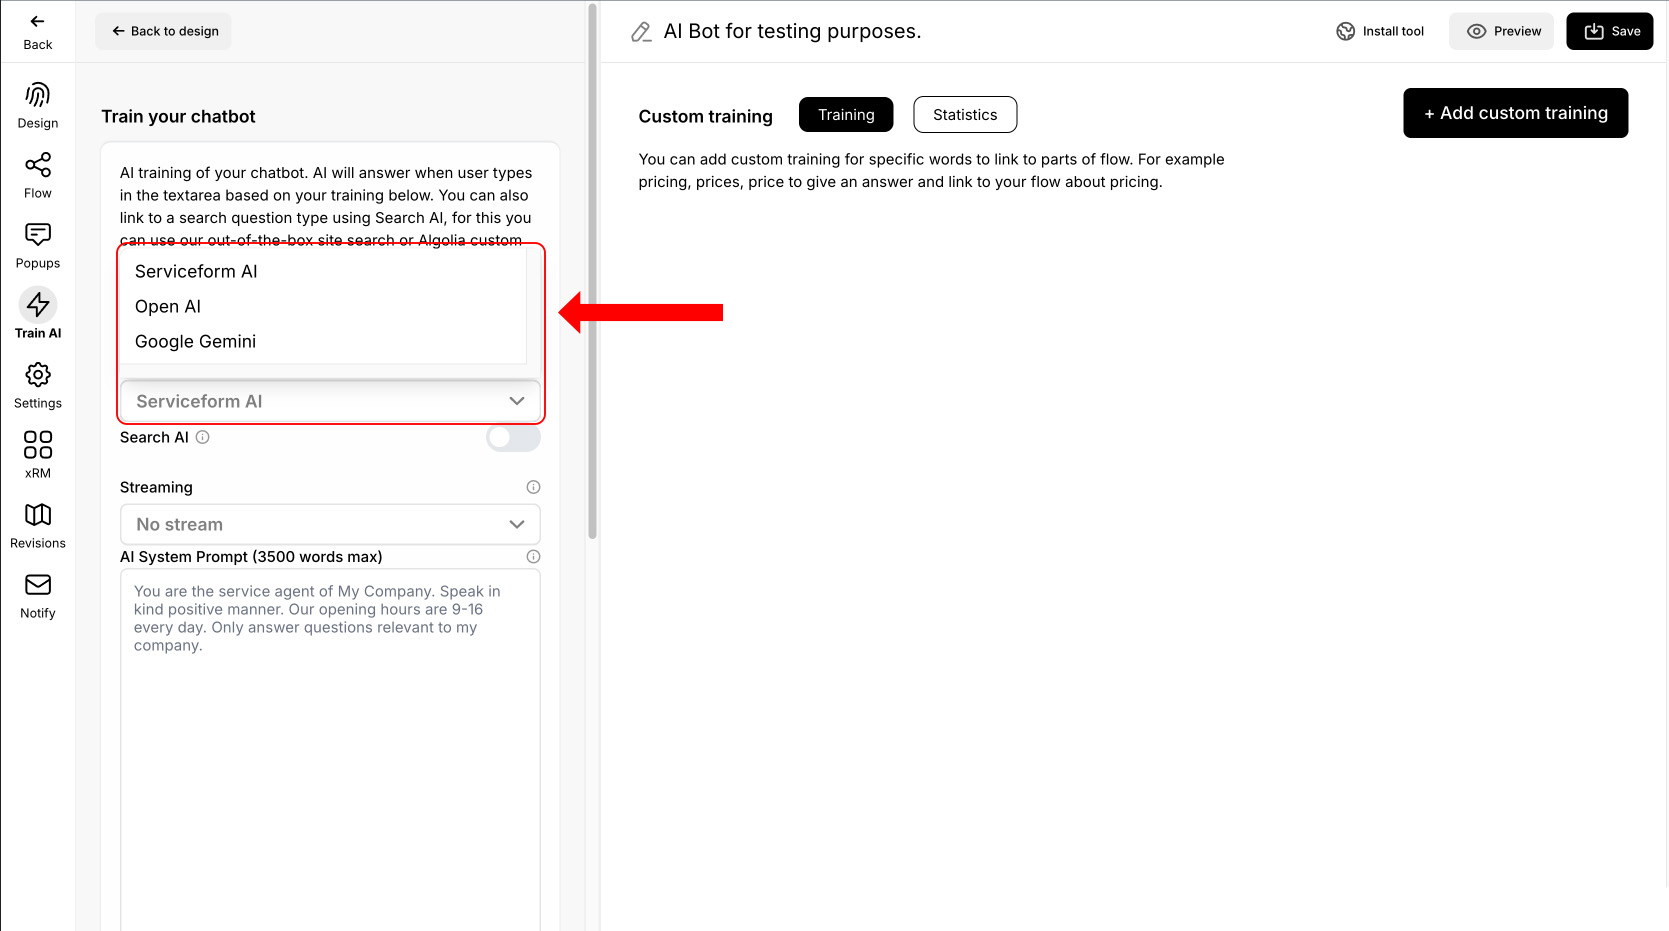
2. Select your preferred AI framework, i.e. Serviceform AI, Open AI, and Google Gemini. Serviceform AI and Open AI is built Chatgpt 4o mini model and Gemini is built on 2.0 Flash model.
3. Select Stream based on your requirement. If you select Stream, the AI response will be displayed as it's being generated, instead of waiting for the full answer. This makes interactions feel faster and more natural.

4. Write your preferred prompts for the AI to answer customer queries. Refer this article to know about writing better prompts.
For example, if the prompt is "You are Serviceform AI bot," the AI will respond with "I am Serviceform AI bot" when asked about its identity.

Additionally, you can improve the performance of the AI by adding the CSS selector of an element(s) under Dynamic AI.
CSS selector is the class or ID of the element in your website. This can be your product's name, price, description, etc. You can add multiple selectors into dynamic AI field separated by comma - [.name, #price, .details].
When a customer asks about these details, the AI uses the provided selector to find and provide the correct information.
Make sure to add '#' and '.' (Full stop) in front of the CSS selector for ID and Class name respectively :

You can link your tool’s AI to your Flex space, allowing the AI to access information from xRM to answer customer queries :
1. Navigate to xRM and click on Add space. Select Start from scratch as your work space and name your space.

2. Click on ⚙️ located next to your space's name and switch the space to a public.

3. Click on Fields and add a new field. Select Text Field, name your field, and click Save Field. This will be your question field.

4. Add another field and follow the same steps as in the previous step. This will be your answer field. Save your space.

5. Click on Add View and create a new item. Enter your question as the title and the answer as the description. Save your item.

6. Navigate to Train AI tab in the Tool builder. Enable AI and select your Flex space under Get data for AI from xRM. Save your tool.
You can verify the setup by asking the relevant question in the bot.

Users can enable their AI assistant to fetch real-time data from live websites.
1. Enter the URLs of the websites, separated by commas, under Webpage URL (Individual pages).

You can also train and use your own OpenAI Assistant by linking it with an Assistant ID and API key, allowing you to cover your own AI usage costs separately and upload multiple documents for training.
A PDF file, which includes all of the required information, can be uploaded via the Open AI playground. Here's how you can do it :
1. Navigate to the Open AI playground site and sign up/ login into your account.

2. Click Assistants -> Create and name your assistant.
.gif)
3. Enable File search and click "+ Files". Click Attach once you have uploaded the file. Find the supported file types via this link.

4. Click on the assistant ID located under the name in order to copy it to the clip board.

5. Click on Dashboard and then API keys. Click on +Create new secret key.

6. Name your key and click on Create secret key.

7. Copy your API Key.

8. Navigate back to the dashboard and paste the assistant ID under Assistant ID. Click on Save.

AI can be trained to provide pre-set responses for specific keywords and can be linked to a section in the flow.
For example, AI can be trained to direct the user to the contact section in the flow when the users types "Contact".
1. Under Train AI, Click "+Add custom training".
2. Type the keywords which will initiate the custom response and jump to the specific section of the flow.
You can type multiple keywords in the same custom response separated by comma. For example - contact, sales support, agent, etc.
3. Select the question to which the user should be directed.
4. Type the custom response and click on Save.
Refer to the video guide below :
.gif)
Improve the AI's efficiency by updating the prompts and adding custom instructions referring to the AI review statistics :
1. In the Dashboard, click Statistics and click on AI training.

The statistics would be visible only if the customer has reviewed the response of the AI :

With this information you can improve the AI prompts and add custom instructions.
This feature can be used to add key words to specific questions in your Chatflow to guide AI responses. If a customer’s query doesn’t match, the AI uses these intents as a fallback, displaying relevant flow questions.
This can be done by :
1. Select your preferred question in the chat flow, scroll down the left pane to find the AI intent option, and enter the keywords.

2. Click Train AI and select AI intents from flow under Fall back questions for AI.

By following these steps and utilizing the various training and optimization features, you can ensure your AI provides accurate and helpful responses to customers, enhancing their experience and generating quality leads for your business 24/7.
Serviceform starts for free and you can use it for free forever. If you want to generate more than 50 interactions per month, our plans start at,
Our help team is always ready to help. You can visit help.serviceform.com to access our help documentation or you can chat with one of our support team members here. Also, you can ask anything in an email to our support team via help@serviceform.com.
The free forever plan gives you access to all conversion tools. Our conversion tool suite includes Chatbots, Forms, Popups, WhatsApp Chatbots, Landing Pages, and much more. You can install as many tools as you wish and get 50 interactions every month entirely for free.
You can sign up with just a single click through Google or Microsoft. Or you can enter your company email address and sign up. No credit card required and you can use Serviceform for free forever.
Our easy drag and drop builder lets you custom, personalized chatbots without having to write a single line of code. If you run into any issues, you can always refer to our help documentation.
Serviceform generates a unique pixel code which you need to simply copy and paste into the <head> tag of your website. Then all you need to do is to toggle a button from our simple website setup, and your conversion tool will be live on your website.
Yes, our conversion specialists are happy to help you do the setup. Simply book an appointment with our team and let them know what you want.
Yes, Serviceform tools can be integrated with more than 100 applications including, Hubspot, Salesforce, ClickUp, and even Google Sheets. Click here to learn more.
Currently, only 5 AI Scraper jobs can run simultaneously. If you have more jobs, they will queue and start automatically once a slot is free.
Try using Manual mode and add a few links to see if they work. If successful, you can continue using Manual mode. For websites with complex structures, also try Manual mode with the Advanced Scraper type.
Some websites block automated requests, which may prevent scraping. To fix this, the customer must whitelist our IP addresses:
Whitelisting these IPs allows our scraper to access the website without being blocked or hitting rate limits. We use only these two fixed IP addresses for scraping.
his may happen if:
Solution: Use Advanced Scraper, double-check CSS selectors, and ensure required URLs are included.
Yes. Limit scraping to one language per site to avoid duplicate information. For example, set the site name to Customer FI if scraping Finnish pages only.
Basic: Always try first—it’s less resource-intensive.
Advanced: Use if Basic doesn’t return results.

%20-%20Copy.png)


.svg)
.svg)
.svg)


.svg)


.svg)
.svg)

.svg)
.png)


.svg)


